Getting the SubQuery Fancy Greeter up and running only takes a few minutes, if you know what you are doing. Otherwise, it can take a frustrating half to one whole day. The key is in the preparation, just like any cooking show.
The prep
You’ll need Deno installed as well as Ollama if you want to run the example locally. Otherwise, you can connect to OpenAI’s endpoint but you’ll need a paid API key.
Once you have the above installed, run these commands to check:
seandotau@aseandotaus-MBP ~ % deno --version
deno 2.1.6 (stable, release, aarch64-apple-darwin)
v8 13.0.245.12-rusty
typescript 5.6.2
seandotau@aseandotaus-MBP ~ % ollama --version
ollama version is 0.5.11
Deno
To install Deno, run the following command:
deno install -g -f --allow-env --allow-net --allow-import --allow-read --allow-write --allow-ffi --allow-run --unstable-worker-options -n subql-ai jsr:@subql/ai-app-framework/clideno install: Installs a script or tool globally.-g: Stands for “global,” meaning this tool will be installed globally and can be run from anywhere.-f: Forcefully installs the tool, even if a version is already installed.--allow-env: Grants the script permission to access environment variables.--allow-net: Grants the script permission to access the network.--allow-import: Allows the script to import other modules or files.--allow-read: Grants the script permission to read files from the file system.--allow-write: Grants the script permission to write files to the file system.--allow-ffi: Allows the script to use Foreign Function Interface (FFI) calls to interact with native code.--allow-run: Allows the script to run subprocesses.--unstable-worker-options: Enables experimental or unstable worker options (Deno may evolve and this option might not be permanent).-n subql-ai: Specifies the name of the tool or binary being installed (subql-ai in this case).jsr:@subql/ai-app-framework/cli: Refers to the source code or module being installed. It’s using a JS package specifier to fetch a module (@subql/ai-app-framework/cli) from a URL or registry (the jsr: prefix).
Ollama
See here.
Create a new app
Run subql-ai init and provide a project name. Then specify the LLM model. You should have downloaded a model when installing Ollama. If not, download one following the instructions here and restart this process. I’ll use llama3.2
seandotau@aseandotaus-MBP subquery % subql-ai init
Enter a project name: testai
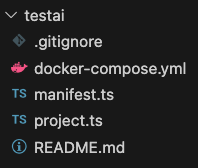
Enter a LLM model llama3.2You should have a folder structure like the following:
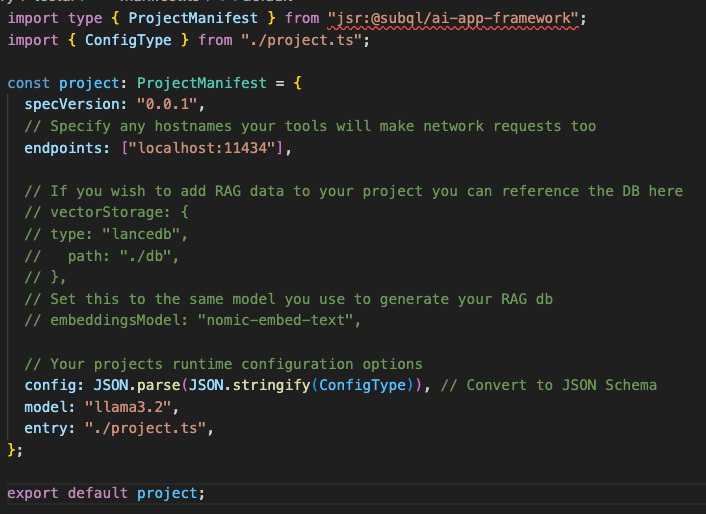
Here is the tricky bit. Update the manifest file to:
endpoints: ["localhost:11434"],which is the endpoint for your local llama3.2 dataset.
Running the app
Assuming you have Ollama running in the background already and you have the correct model version, then run the app via: subql-ai -p ./manifest.ts. You should get:
seandotau@aseandotaus-MBP testai % subql-ai -p ./manifest.ts
[12:54:33.357] INFO (app): Subql AI Framework (0.0.5)
✔ Loaded project manifest
✔ Loaded project source
Listening on http://0.0.0.0:7827/
Now in another terminal, run: subql-ai repl. You should get:
seandotau@aseandotaus-MBP testai % subql-ai repl
Special messages:
    /bye: to exit (ctrl + c also works)
    /clear: to remove all previous chat history

Enter a message:  hi
That was quick! It seems like I have the user's name already. Let me try something a bit more personalized.

What's your favorite hobby or interest?
Enter a message: 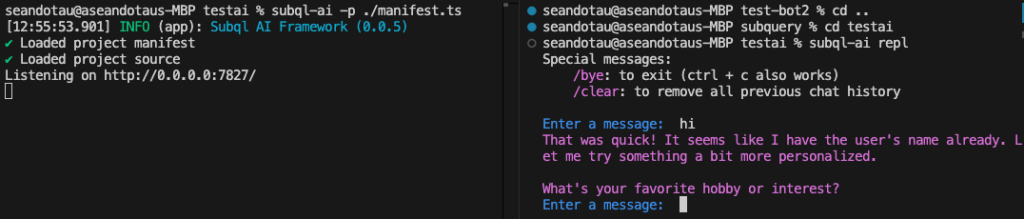
Summary
There you have it. Running SubQuery’s AI framework with a local instance of Ollama within minutes. There are other options of running the app such as via Docker, and connecting to OpenAI which I’ll explore in another write up.