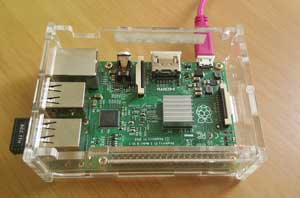
Interested in getting Ethereum running on a Raspberry Pi 2? Here are some simple steps:
Step 1: You get, I get, We get
>> wget https://gethstore.blob.core.windows.net/builds/geth-linux-arm7-1.8.1-1e67410e.tar.gz
Of course this means you know what wget is (a way to download files using cmd) and you have already ssh’d into your raspberry pi with something like ssh pi@192.168.x.x

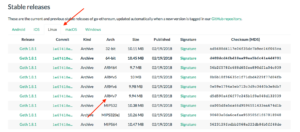
Where did this link come from? It came from https://geth.ethereum.org/downloads/ Search for Linux -> armv7 for the Raspberry Pi 2 and you’ll find the link. This is important to know because you’ll want to change the link to retrieve the latest binary.
Step 2: Lay down the tar-seal and zip it up
>> tar -xvf geth-linux-arm7-1.8.1-1e67410e.tar.gz
The file downloaded is a tar or a “Tape Archive” in reference to the good old days when files would be put on “tapes” and then archived for storage. It is also known as a tarball. It stores multiple files together as a single file. gz stands for GNU zip which compresses it. This is the equivalent of Winzip in the windows world.
The x flag extracts it, v stands for verbose output, telling the user what is happening in more details and f tells tar to use the file specified otherwise tar will use the system-dependent default file of the form /dev/rmt0

Step 3: cd your CDs and mv your body
>> cd geth-linux-arm7-1.8.1-1e67410e
cd stands for Current Directory. It moves the user into the geth-linux-arm7-1.8.1-1e67410e directory that was automatically created when you fired the tarball cannon.
>> sudo mv geth /usr/local/bin/
mv moves the geth binary to the new location user/local/bin which is the standard place for binaries to be placed.
That is it. The next step is to start geth which again is the Ethereum client written in the Go programming language, hence the name “geth” and it will start downloading the Ethereum blockchain.
Consideration #1: Disk space
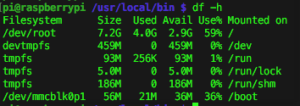
On a Raspberry pi, disk space will be limited. You probably have an 8Gb SD card. Make sure you have at least 500Mb free if not more.
Consideration #2: Light Sabre mode
>> geth --testnet --syncmode "light"
Run on testnet with syncmode = light. This means the blockchain will only be several hundred Mb instead of Gb!
![]()
Consideration #3: Running a defence screen
>> screen geth --testnet --syncmode "light"
This will keep geth running and after you close the terminal screen. Otherwise geth will close down.
Consideration #4: Chaindata directory

The blockchain will be in a folder called lightchaindata in ~/.ethereum/testnet/geth
Consideration #4: Connecting to via IPC
>> geth attach ipc:/home/pi/.ethereum/testnet/geth.ipc
Ref: https://owocki.com/install-ethereum-geth-raspberry-pi-b/
this exact what i was looking for . thanks for sharing. worked perfect